Good afternoon readers!
Today is a beautiful day that needs to be enjoyed outside. But first, let me give you a quick Valentine’s Day DIY since that special day is coming up right around the corner. Even though Valentine’s Day has become more of a ‘Hallmark Holiday’ and people have started to care less about spoiling their significant other on this day, I still like to do something cute. I know, I know… ‘but Jessica, you’re supposed to show your partner that you love them EVERYDAY.’ I do! (more…)
instructions
DIY Lace Bralette
Come on, you’ve seen them worn in many cute ways. Or just worn. AND in many cute forms! BUT have you considered making your own to save some money or to create them in your size? (more…)
DIY Dandelion Paperweight
See that yellow flowered weed that is growing in your yard? One day it’ll burst into a silly looking, white dandelion seed head. You’ll either stomp on it, cut it out, or have the same mentality as I do about them. That dandelion means something to someone like me. When I was younger I was told that they make wishes come true. Close your eyes, whisper a wish into the seeds, then blow them into the air.

LATE DIY Bottled Nebula
Have you ever written a blog post or typed out something for class in Word then accidentally deleted it. Like, to never be seen again? As in there is no way in getting it back? No? Just me? Great. (more…)

DIY Spooky Halloween Decorations
Happy Sunday Funday!
Hope you all have had a great day so far. The night is not over and there is still some time to create some more Halloween decorations. This week I have some simple and fairly cheap DIYs for you to try out.
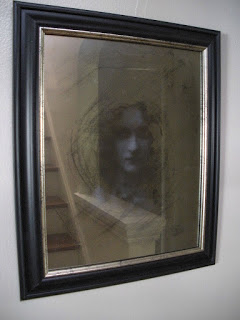
Eerie Mirror from Domythic Bliss
Materials:
Printed image
Frame
Spray Paint
Instructions:
Print image
Take apart frame
Spray paint inside of glass
Use rag to make scratch marks
Let dry
Put back together
For detailed instructions, visit Domythic Bliss’ tutorial here.
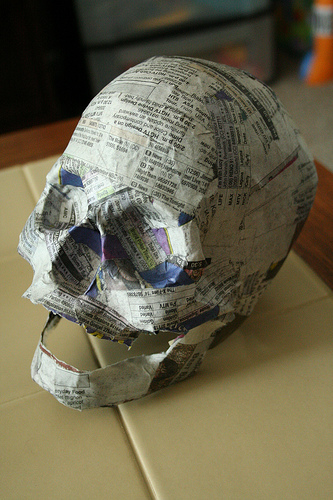
Paper Mache Skull from Grim Hollow Haunt
Materials:
Basic Skull
Newspaper
Paper mache paster (1 part water/ 1 part flour or 3/4 glue/ 1/4 water)
Tape
Instructions:
Use skull as base
Layer newspaper over
Let dry
Cut/ peel off
Tape back together
For detailed instructions, visit Grim Hollow Haunt’s tutorial here.
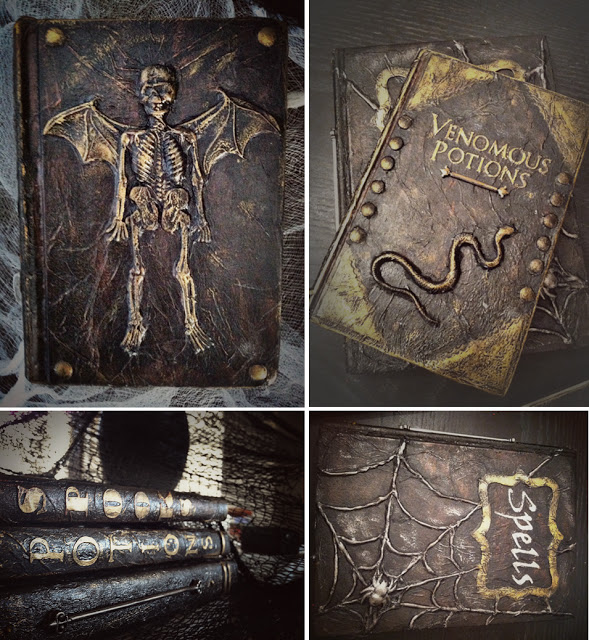
Spell & Potion Book from Better After
Materials:
old books
paper towels
small plastic Halloween paraphenilia
letters
hot glue gun
mod podge
black paint
metallic paint
paint brushes
Instructions:
glue plastic pieces to books
use mod podge to layer paper towels
let dry
paint black
let dry
use metallic paint for details
For detailed instructions, visit Better After’s tutorial here.

DIY Halloween Decor
We’re getting closer to my favorite holiday! I totally forgot to post my Saturday Styles yesterday but this next week I plan on sharing some simple costumes to put together in case you’re in a rush for some last minute parties or events.
Today, I am sharing three Pinterest Halloween crafts that I found. They seem super easy, pretty cheap to recreate, and creepy enough to use in your home for this spooky holiday. Yes, Halloween in a holiday to me.
Let’s begin!
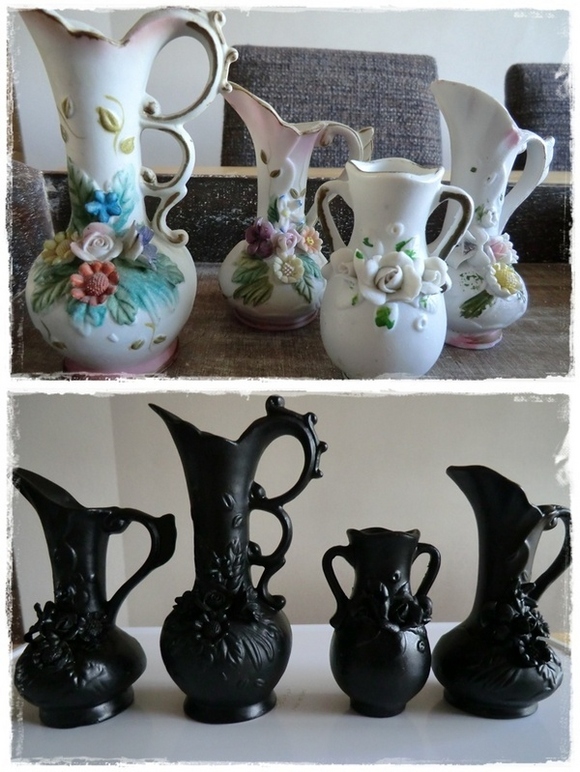
Black Vases
I found this on Pinterest and the link sent me to Kerli (one of my favorite artists) on her Buzznet account. However, there is no tutorial on how to create these beautiful vases. It does seem simple though.
1. Find vases at thrift stores or yard sales
2. Clean them
3. Buy black spray paint or black paint
Other materials include newspaper, face masks, and gloves.
This tutorial on apothecary bottles is thanks to Magia Mia on magiamia.blogspot.com
Materials:
pill bottles, jars, little plastic containers
glue gun
black chalk paint
rusty colored paint
cork
Instructions:
Draw designs and wording on bottles
Use glue gun to trace over words
Paint over with black chalk paint
Dab rust colored paint over to add aging effect
Cut cork into round size for each bottle top
For a better, detailed instructions check out the tutorial here.
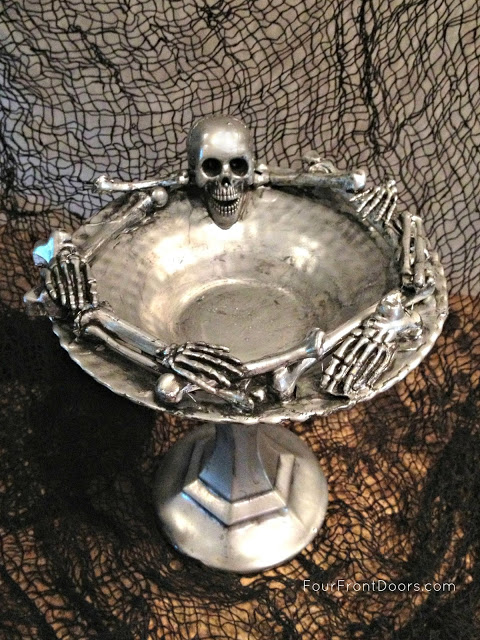
Spooooky! Check out this dollar store DIY from Four Front Doors.
Materials:
plastic skeleton
plastic candle holder
plastic tea light holder
glue
white/ silver spray paint
black acrylic paint
Instructions:
Glue tea light holder to candle holder
Break skeleton into pieces
Glue pieces to tea light holder
Prime entire piece with white spray paint
Then spray with silver spray paint
Use black acrylic paint to in details
Use paper towel to wipe away some paint to add texture
For more detail, check out the tutorial here.

DIY Laptop and iPad Covers
Okay, so by now you should know that I am not a very artsy-craftsy person. I would love to be but I don’t have the time to be. The most I have done it wrap some cheap file holders from IKEA with tape or scrapbook paper.
I really like checking out DIYs on Pinterest and saving them for the day I feel like creating something magical. Today, I found this super cute tutorial from lifeannstyle.com for creating your own laptop and iPad covers.
Materials:
Hard case for ipad/laptop. I bought it in clear on Ebay.
Spray paint
Rubbing alcohol
Colorful gloss paper
Glitter paper
Printed pictures on high gloss paper. I used pictures from Instagram and had them printed out at Staples.
Spray adhesive. I used Easy Task
UV Resistant gloss coat
Craft paint
Paint tray
Water
Clear acrylic coating
Ruler
Gilded gold paint
Decoupage glueInstructions:
Mosaic Design:
Using a paper towel with some rubbing alcohol, wipe off any dust or oil off the surface of the cover.
Next, spray on an even layer of paint (color of your choice). I recommend spraying on at least 2 layers. Set aside to dry.
For the mosaic, use colorful gloss paper and printed pictures. To cut out the shape for the mosaic, I used a shape puncher purchased from a local craft store. I used a variety of different of different gloss, metallic, and glitter to add dimension and texture.
Lay out your design on top of the cover.
Use spray on adhesive to the back of each piece and place it where you would like.
Seal with clear gloss coat. Let dry completely before use.Feathers Design:
Clean case using paper towel and rubbing alcohol.
Set up tray and brushes. Have some water on the side.
Draw out your design on a piece of paper. I drew out some feathers, but you can be creative and draw what inspires you.
Place your template under the cover and paint over the template. I suggest practicing on a piece of paper before doing it on your cover.
If you are painting feathers, use wispy, short strokes and layer on layer on different colors to add interest.
Spray on clear acrylic coating. Let dry completely before use.Arrows Design:
Clean case using a paper towel and rubbing alcohol.
Using a ruler, draw arrows parallel to each other.
Use gold paint and paint over the arrows. Add glitter for more shine.
Spray on clear acrylic to protect your cover. Let dry completely before use.
Coco Chanel Design:
Clean case using a paper towel and rubbing alcohol.
Print out picture of perfume bottle on high gloss paper.
With scissors, carefully cut out picture.
Use decoupage glue on back of cut-out picture and adhere to cover.
Brush on decoupage glue over picture to seal and protect your cover. Let dry completely before use.
Check out her tutorial on www.lifeannstyle.com and don’t forget to watch her video!
DIY Hot Air Balloon Mobile
Pregnant or know someone who is?
Create this super cute mobile to hang above the crib!
Get the full tutorial from persialou.blogspot.com

DIY Pallet Coffee Cup Holder
Check out this super rad tutorial on how to create a coffee cup holder!
Materials & equipment:
Pallet
Hooks and screws
Paint, letter stencils, sponge brush (Optional)
Sandpaper
Right angle ruler
Ruler or tape measure
Pencil
Safety glasses
Circular Saw
Cordless Drill
Screwdriver
Thank you jexshop.com for the instructions! ♡

DIY Wine Cork Jewelry Rack
Super cute, right?
If you’re a big wine drinker, saving up these little bad boys won’t be hard. However, if you’re not a drinker, you can pick up some wine corks on Bed Bath & Beyond, Amazon, Michaels, and I’ve even see them at Target. Or if you know someone who drinks a lot of wine, you can ask them!
I found the photo on Pinterest that links to an Etsy account. So, there is no already made tutorial. Here is mine:
Materials-
Wine Corks
Ribbon
Hot glue gun
Hooks
Instructions-
1. Glue the wine corks together, either in a straight line or jagged for a cool look.
2. Let the glue cool.
3. Insert hooks into the bottom of the corks.
4. Insert two hooks at each end of the rack.
5. Attach ribbon to the top hooks.
Tah-duh! Pretty simple (:
![[UNSET]](https://thatlawriter.wordpress.com/wp-content/uploads/2015/10/unset.jpg?w=620)
